
Sustainability
Climatic Simulations
Environmental models make invisible conditions visible, allowing teams to compare design options before key decisions become expensive to change.
Purpose
Use simulation to guide a decision, not decorate a report.
Every study starts with a specific question: which massing option receives useful daylight, where shading is needed, whether a ventilation path is plausible, or how envelope choices affect demand.
Inputs, assumptions and limitations are recorded so results can be discussed as evidence rather than treated as certainty.
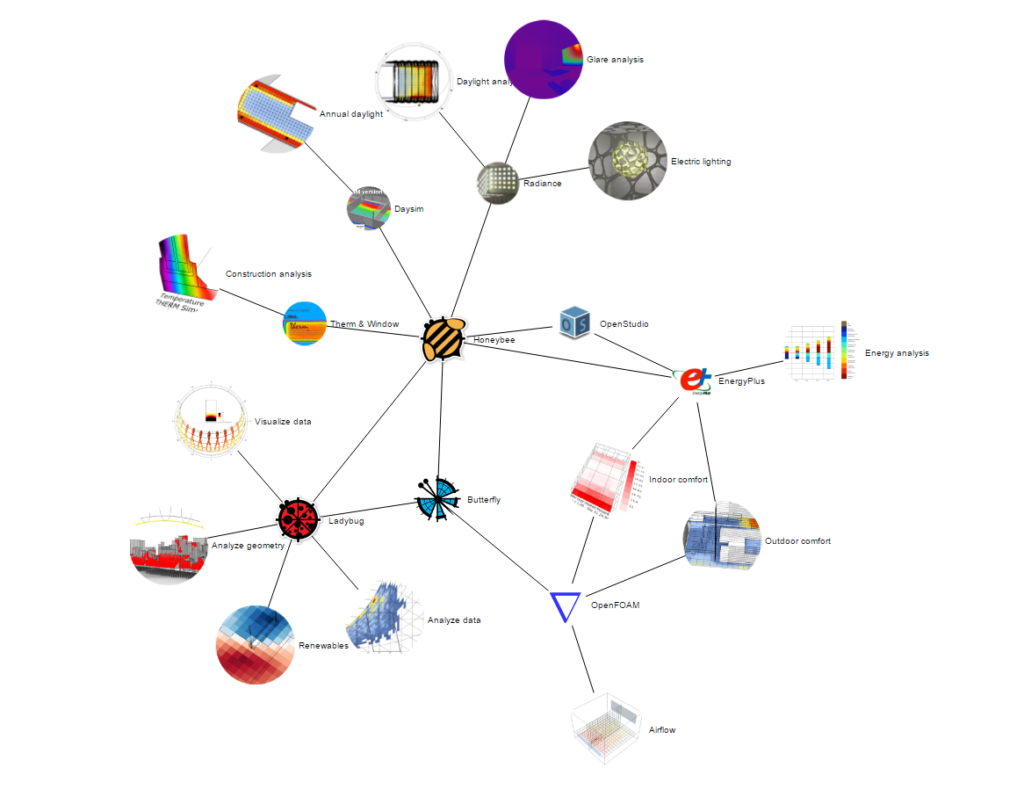
Grasshopper ecosystem
A coordinated environmental workflow.
Climate, geometry and building assumptions can be connected in one parametric environment, making design revisions and comparisons more consistent.
01
Climate context
Ladybug
Reads weather data through sun paths, radiation, temperature and outdoor comfort views, helping early design discussions respond to the local climate.
02
Daylight and energy
Honeybee
Connects design models to established daylight and energy engines so envelope, glazing, shading and occupancy assumptions can be compared.
03
Building systems
Ironbug
Provides a visual route for assembling detailed HVAC and energy-system workflows, supporting transparent comparison of selected system options.
04
Airflow and CFD
Butterfly
Supports airflow, pressure and velocity studies for natural ventilation, outdoor wind conditions and design refinements around openings and form.
Study sequence
From question to design action.
01
Frame
Define the decision, climate file, geometry stage and comparison criteria.
02
Model
Build an appropriate level of detail and record material and use assumptions.
03
Compare
Test meaningful alternatives using consistent conditions and readable outputs.
04
Advise
Translate results into design priorities, limitations and the next verification step.
Next step
Define the environmental question.
A focused question produces a more useful model, clearer comparisons and recommendations that a design team can act on.